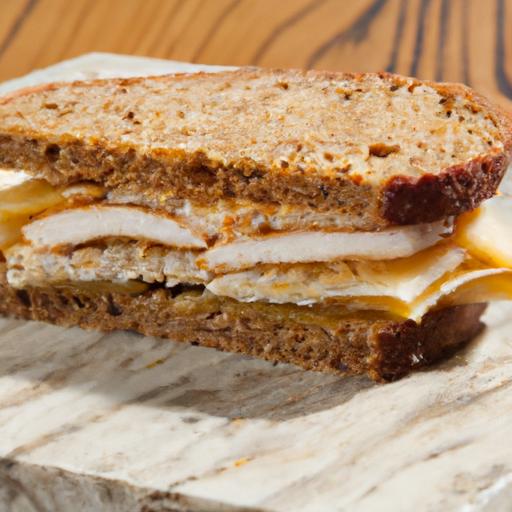
There’s something irresistibly comforting about a perfectly toasted sandwich-the golden, crispy exterior giving way too a treasure trove of melted cheese, savory fillings, and vibrant flavors inside. Crafting this simple yet sublime delight, however, is more art than accident. From choosing the ideal bread to mastering the precise heat, each element plays a crucial role in elevating an everyday snack into a crispy, delicious masterpiece. In this article, we’ll explore the secrets behind the art of the perfect toasted sandwich, guiding you step-by-step to a crunchy, gooey creation that satisfies every craving. Get ready to toast like a pro and transform your kitchen into a haven of smoky, warm indulgence.
The Art of the perfect Toasted Sandwich: Crispy & Delicious
The art of the perfect toasted sandwich: crispy & delicious starts with selecting the right bread and mastering the harmony of flavors and textures inside. Whether you crave a nostalgic grilled cheese or an adventurous savory stack, achieving that golden crunch with a symphony of fillings awakens every bite. This guide will walk you through everything you need to no-from choosing bread that delivers both crunch and flavor,to creating balanced fillings,ensuring even toasting,and unleashing creative twists that elevate your sandwich experience to new heights.
Prep and Cook Time
- Readiness: 10 minutes
- Cooking: 8-12 minutes
- Total Time: 20-22 minutes
Yield
Serves 2 hearty sandwiches
Difficulty Level
Easy to Medium – perfect for beginners and home foodies ready to impress
Ingredients
- 4 slices artisan sourdough or rustic country bread (day-old preferred)
- 3 tbsp softened unsalted butter, divided
- 4 oz sharp aged cheddar, sliced
- 2 oz smoked ham or turkey, thinly sliced (optional)
- 1 small ripe tomato, thinly sliced
- 1 tbsp Dijon mustard or grainy mustard
- Fresh basil leaves or arugula for peppery freshness
- Salt and freshly ground black pepper to taste
Instructions
- Prepare your bread: Start by spreading 1 tbsp softened butter evenly on one side of each bread slice. This fat is essential for that signature golden crunch during toasting.
- Build the sandwich: place two slices, buttered-side down, on a clean surface. Spread about 1/2 tbsp mustard on each slice’s unbuttered side.Layer sliced cheese first – it acts as a glue to hold everything together once melted.
- Add tomato slices and season lightly with salt and pepper to cut through the richness. Top with your chosen protein if using, and finish with fresh basil or arugula for a layer of luminous texture.
- Top with the remaining slices of bread, butter side facing up, to complete the assembly.
- Heat your pan or sandwich press: A heavy skillet or cast-iron pan over medium heat works best. Place the sandwich carefully in the pan and press down gently with a spatula or a weighted pan press.
- Toast evenly: Let the sandwich cook for about 4-5 minutes per side. Check frequently enough to ensure your bread achieves an even golden-brown crust without burning. Flip carefully using a wide spatula. For crispier edges, gently press the sandwich once flipped.
- Check for melt: The cheese should be gooey and fully melted inside. If the bread browns too quickly before the cheese melts, reduce the heat and cover the pan briefly to trap heat and encourage melting.
- Slice and serve immediately: Rest for 1-2 minutes before slicing diagonally.This small pause lets the cheese set enough to avoid oozing away.
Tips for Success: Mastering the Balance of Fillings and Even Toasting
- Use day-old bread or lightly toasted bread to avoid sogginess and help achieve that coveted crunch.
- layer fillings thoughtfully: cheese first creates a molten barrier to protect bread from damp ingredients like tomato.
- Pat dry juicy vegetables beforehand to maintain crispness.
- Control heat carefully-a moderate medium flame ensures surface browns without burning while melting inside.
- If using a sandwich press, consider layering a sheet of parchment to catch drips and ease cleanup.
- Experiment with textures by adding crunchy pickles or toasted nuts inside for an unexpected twist.
- For an even golden finish, flip the sandwich multiple times on lower heat rather of a single prolonged cook on each side.
Creative Tips to elevate Your Sandwich Experience
Try spreading a thin layer of garlic aioli or honey mustard on the bread for bursts of aromatic and sweet complexity. Incorporate sautéed mushrooms or caramelized onions to add umami depth and silky mouthfeel. Instead of plain butter, mix softened butter with fresh herbs like thyme or rosemary for an herbaceous crunch. Use multi-grain or seeded breads to introduce nutty undertones and a rustic aesthetic. make it a signature by topping with a sprinkle of smoked paprika, crushed chili flakes, or a drizzle of balsamic glaze post-grilling.
Serving Suggestions
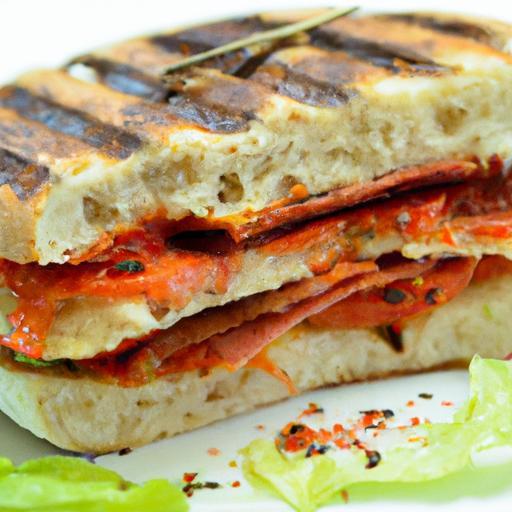
Serve your sandwich sliced on a rustic wooden board or a brightly colored ceramic plate to contrast with the golden crust and melted cheese. Garnish with microgreens or a handful of peppery rocket for freshness.Pair with homemade chunky tomato soup, crisp pickles, or a vibrant slaw to complement the rich, toasted indulgence. A side of kettle chips or kettle-cooked crisps adds textural play while a lightly chilled glass of sparkling water or a craft lager refreshes the palate.

| Nutrient | Amount per Sandwich |
|---|---|
| Calories | 480 kcal |
| Protein | 22 g |
| Carbohydrates | 38 g |
| Fat | 25 g |
explore more sandwich inspiration with our Ultimate Grilled Cheese Recipes and deepen your culinary skills. for expert advice on bread selection and pairing techniques, check out this Serious Eats Bread Guide.
Q&A
Q&A: The Art of the Perfect Toasted Sandwich - Crispy & Delicious
Q1: What makes a toasted sandwich truly perfect?
A1: The secret lies in the balance of texture and flavor. A perfect toasted sandwich boasts crispy, golden-brown bread that snaps delightfully when bitten, while the inside remains warm, gooey, and bursting with luscious fillings. It’s the harmony between crunch and melty goodness that transforms an ordinary sandwich into a culinary masterpiece.
Q2: Which bread types work best for toasting?
A2: sturdy breads with a bit of chew and structure rule the toasted sandwich world. Think rustic sourdough, hearty whole grain, or a thick white sandwich loaf.These breads toast beautifully-giving you that irresistible crunch without crumbling apart. Avoid super soft or excessively thin slices that can turn soggy or tear.
Q3: how do you achieve that golden crust without burning the bread?
A3: Patience and temperature control are key.Toast your sandwich on medium heat, allowing the bread to brown evenly while giving the fillings enough time to warm through and melt. Using a little butter or olive oil on the outside adds flavor and encourages even crisping, but keep the heat gentle to avoid charring.
Q4: What’s the best way to layer ingredients inside?
A4: Layer thoughtfully! Start with a thin spread of butter or mayo directly on the bread to create a moisture barrier, preventing sogginess. Then alternate layers of cheese (the melty kind is a must), proteins, and veggies.For extra flavor, add a dash of mustard, a sprinkle of herbs, or a drizzle of honey. Keep wet ingredients like tomatoes minimal or pat them dry to maintain crispness.
Q5: Can toasted sandwiches be healthy and still delicious?
A5: Absolutely! Opt for whole-grain bread, lean proteins like grilled chicken or turkey, plenty of fresh veggies, and moderate amounts of cheese. Using healthy fats such as avocado or olive oil can enhance flavor and nutrition. The key is balance-flavor without excess grease or heaviness.
Q6: Are there any tools or gadgets that help perfect the toasted sandwich?
A6: While a classic pan and spatula work wonders, devices like sandwich presses or panini grills can deliver that perfect, uniform crunch effortlessly. For a more rustic approach, a cast-iron skillet allows excellent heat control and a stunning crust. Whichever tool you choose, the love and attention you put in remain the main ingredient.
Q7: Any insider tips to elevate my toasted sandwich game?
A7: Yes! Let the sandwich rest a minute after toasting to allow the cheese to set, making it less likely to spill out while eating. Experiment with unexpected fillings-think caramelized onions,pesto,or spicy pickles-to add layers of flavor. And remember, the best toasted sandwich is the one crafted with your personal flair.
Q8: How can I customize toasted sandwiches for different dietary preferences?
A8: Flexibility is the beauty of toasted sandwiches! For vegetarians,try hearty mushrooms,grilled veggies,or plant-based cheeses. Vegans can rely on dairy-free cheeses, creamy avocado, and crisp greens. Low-carb enthusiasts might swap bread for grilled eggplant or lettuce wraps. It’s all about creativity without losing that crave-worthy crunch.
Mastering the toasted sandwich is a delicious journey, blending texture, temperature, and taste into every crispy bite. Whether a speedy snack or decadent meal, the perfect toasted sandwich is truly an art form worth savoring.
to sum up
As you embark on your own toasted sandwich adventures, remember that the perfect bite lies at the crossroads of crispy texture and melty, harmonious fillings. Whether you favor classic combinations or daring flavor fusions, mastering the art of the toasted sandwich is a delicious journey-a balance of technique, patience, and a pinch of creativity. So next time you hear the gentle sizzle of bread toasting, seize the moment: your crispy, golden masterpiece awaits.Here’s to elevating a humble favorite into an unforgettable, savory delight-one perfect toast at a time.