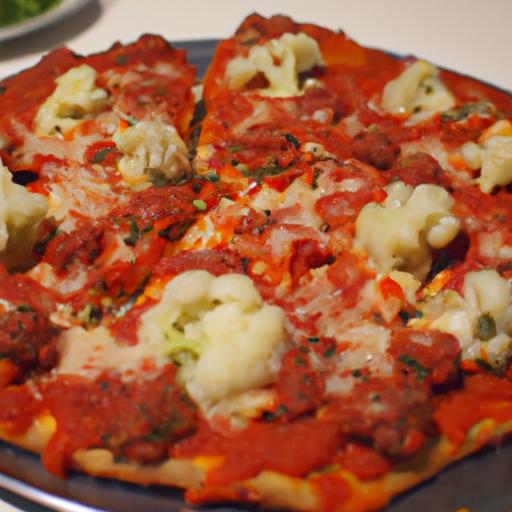
there’s something undeniably satisfying about biting into a slice of pizza-melty cheese stretching, savory sauce bursting wiht flavor, and a perfectly crisp crust holding it all together. But what if you could enjoy that classic comfort food without the heaviness of traditional dough? Enter the DIY cauliflower crust pizza, a clever and tasty twist that transforms humble vegetables into a gluten-free, low-carb canvas for your culinary creativity. Paired with a fresh homemade marinara sauce, this vibrant combination not only delights the palate but also fuels the body with wholesome ingredients.in this article, we’ll guide you step-by-step through crafting your own cauliflower crust pizza, topped with a rich and zesty marinara made from scratch-because great pizza starts from the ground up.
DIY Cauliflower Crust Pizza with Fresh Homemade Marinara: Choosing the Perfect Cauliflower and More
DIY Cauliflower Crust Pizza with Fresh Homemade Marinara is a delightful way to enjoy a lighter, gluten-free twist on a beloved classic. Beginning with the right cauliflower ensures your crust serves as a wonderfully fluffy, yet sturdy base that holds fresh, vibrant toppings without sogginess. Over the years, mastering the pressing and draining technique, accompanied by a rich homemade marinara, has been my secret to consistently perfect pies. Let’s dive into the art behind each critical step and elevate your homemade pizza experience.
Prep and Cook Time
- Readiness: 30 minutes
- Cooking: 20 minutes
- Total: 50 minutes
Yield
Serves 2 to 3 hungry pizza lovers
Difficulty Level
Medium – Perfect for cooks with some kitchen confidence aiming to impress friends or family
Ingredients
- 1 medium head of fresh cauliflower (about 4 cups finely riced)
- 1 large egg, beaten
- 1/2 cup shredded mozzarella cheese
- 1/4 cup grated Parmesan cheese
- 1 tsp dried Italian herbs (oregano, basil, thyme blend)
- 1/2 tsp garlic powder
- Salt and freshly ground black pepper to taste
- 2 tbsp olive oil (divided)
- Fresh marinara sauce:
- 4 ripe Roma tomatoes (or 1 can of whole peeled tomatoes)
- 3 garlic cloves, minced
- 1 small onion, finely chopped
- 2 tbsp olive oil
- 1 tsp sugar
- Handful fresh basil leaves, chopped
- Salt and pepper to taste
- Toppings of choice (e.g., sliced bell peppers, mushrooms, fresh basil, extra cheese)
Instructions
- Selecting and Preparing the Cauliflower: Wash the cauliflower and remove leaves and core. Pulse florets in a food processor until it resembles fine rice-avoid overprocessing to prevent mushiness.
- Mastering the Pressing and Draining: spread the riced cauliflower in a microwave-safe bowl and microwave for 5 minutes to soften. Let cool slightly, then transfer to a clean kitchen towel or cheesecloth. Press firmly to squeeze out as much moisture as possible-this step is crucial for a fluffy crust texture without sogginess.
- Mixing the Crust: In a bowl, combine drained cauliflower, beaten egg, mozzarella, Parmesan, Italian herbs, garlic powder, and a pinch of salt and pepper. Mix until a dough forms.
- Forming and Baking the Crust: on a baking sheet lined with parchment paper, spread the mixture into a thin, even 9-10 inch circle. Brush the crust lightly with 1 tbsp olive oil for extra crispness.Bake at 425°F (220°C) for 15-18 minutes until golden and firm.
- Crafting the Fresh Homemade Marinara: While the crust bakes, heat 2 tbsp olive oil in a saucepan over medium heat. Sauté the chopped onion until translucent, about 5 minutes. Add garlic, cook 1 minute until fragrant. Add chopped or canned tomatoes and sugar, simmer for 15 minutes. Season with salt, pepper, and fresh basil.Blend smooth or leave chunky to your liking.
- Assembling the Pizza: Remove the crust from oven, spread a generous layer of fresh marinara sauce. Top with your preferred toppings and a sprinkle of mozzarella or Parmesan.
- Final Bake: Return pizza to oven for 5-7 minutes until cheese melts and edges are crisp and golden.
- Serving: Let the pizza rest for 3 minutes before slicing to maintain structure and allow flavors to meld.
Tips for Success
- Choose a firm,white cauliflower: Freshness is key. Avoid any with brown spots or wilted leaves for a clean, mild flavor and best texture.
- Pressing and draining is non-negotiable: Use a tightly wrung towel or cheesecloth – leftover moisture is the enemy of a crispy crust.
- Par-bake the crust well: Make sure the edges look golden brown; this locks in structure before adding toppings.
- Customize the marinara: For depth, add a splash of red wine or a hint of crushed red pepper flakes during simmering.
- Make-ahead option: Prepare the crust and sauce a day in advance and refrigerate separately. Assemble and bake fresh for the best results.
- For extra crunch: Sprinkle a bit of grated Parmesan on the crust edges before the first bake.
serving Suggestions
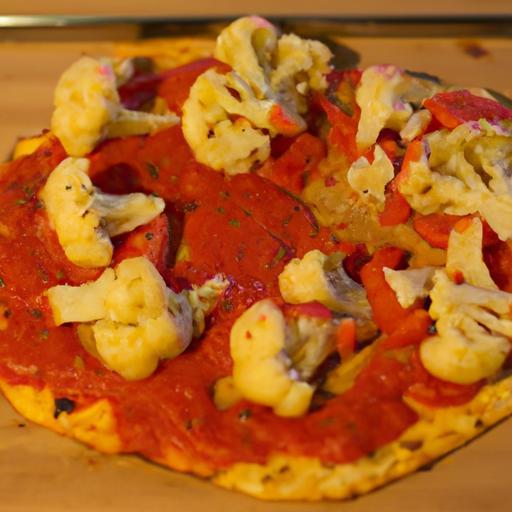
slice your DIY cauliflower crust pizza into rustic wedges and serve on a wooden board for a cozy presentation. Garnish with torn fresh basil leaves and a drizzle of high-quality extra virgin olive oil. pair with a crisp green salad or a chilled glass of sparkling water with lemon to refresh the palate. Leftovers reheat beautifully in a hot skillet to restore crispness rather than the microwave.
| Nutrient | per serving |
|---|---|
| Calories | 320 kcal |
| Protein | 18 g |
| Carbohydrates | 15 g |
| Fat | 20 g |
For those inspired to explore more wholesome pizza recipes, don’t miss our Gluten-Free Pizza Dough 101.And for understanding the health benefits of cauliflower as a nutrient-packed ingredient, visit Healthline’s thorough guide to cauliflower.

Q&A
Q&A: DIY Cauliflower Crust Pizza with Fresh Homemade Marinara
Q1: Why choose cauliflower crust over traditional pizza dough?
A: Cauliflower crust offers a lighter,low-carb alternative to classic pizza dough. It’s packed with fiber, vitamins, and minerals, making your pizza both nutritious and delicious. Plus, it’s gluten-free, perfect for those with dietary restrictions or anyone craving a healthy twist.
Q2: How do you prepare cauliflower to make the perfect crust?
A: Start by pulsing raw cauliflower florets in a food processor until they resemble fine rice grains. Then, steam or microwave this “cauliflower rice” to soften it. The key step is squeezing out as much moisture as possible-this keeps your crust crispy and prevents sogginess.
Q3: What ingredients are essential for binding the cauliflower crust?
A: Typically, eggs and a bit of cheese (like mozzarella or parmesan) help bind the mixture together. Some recipes also incorporate almond or coconut flour for extra stability. These binders create a dough-like texture that holds up well during baking.
Q4: How is fresh homemade marinara different from store-bought sauce?
A: Fresh homemade marinara bursts with vibrant flavors from ripe tomatoes, garlic, fresh herbs (like basil and oregano), and a splash of olive oil. Unlike many store-bought sauces, it’s free from preservatives, added sugars, and unnecessary additives, making your pizza sauce fresh, radiant, and wholesome.
Q5: Can I customize my cauliflower crust pizza toppings?
A: Absolutely! From classic mozzarella and pepperoni to roasted veggies, fresh greens, or even a sprinkle of chili flakes-your pizza is your canvas. Experiment with vibrant, seasonal toppings for a truly personal, guilt-free pizza experience.
Q6: What’s the best way to bake cauliflower crust pizza to ensure it’s crispy?
A: Preheat your oven to a high temperature (around 425°F/220°C). Bake the crust alone for 15-20 minutes until golden and firm before adding the marinara and toppings. This two-step baking ensures a crisp crust that can hold all your delicious toppings without becoming soggy.
Q7: Is cauliflower crust pizza suitable for vegans?
A: It can be! Replace eggs with flax or chia seed “eggs,” and use vegan cheese alternatives. Pair it with a fresh homemade marinara sauce loaded with herbs and garlic, and you have a vibrant, plant-based pizza that doesn’t skimp on flavor.
Q8: How long can homemade cauliflower crust pizza be stored?
A: Store leftovers wrapped tightly in the refrigerator for up to 3 days. For longer storage, you can freeze unbaked cauliflower crusts for up to 2 months-just thaw and bake when you’re ready for a quick, healthy meal.
Q9: Any tips for preventing the cauliflower crust from becoming soggy?
A: Definitely! Beyond draining the cauliflower rice thoroughly, using parchment paper and a lightly greased pizza stone or baking sheet can help crisp the base. Avoid piling on too many watery toppings, and remember to pre-bake the crust before adding sauce and cheese.
Q10: Why make your own marinara sauce instead of buying one?
A: Homemade marinara lets you control ingredients, tailoring the sauce to your taste and dietary needs. It’s fresher, more aromatic, and simply more satisfying than shelf-bought sauces. plus, your kitchen will smell absolutely amazing as it simmers!
In summary
Embracing the art of making your own cauliflower crust pizza paired with fresh homemade marinara is more than just a culinary project-it’s a celebration of creativity and wholesome flavors coming together in your own kitchen. This delightful alternative to traditional pizza not only caters to those seeking a lighter, nutrient-packed option but also opens the door to endless customization. Whether you’re a seasoned home cook or a curious beginner, mastering this recipe empowers you to enjoy a vibrant, satisfying meal that’s as fun to make as it is to eat. So next time the pizza craving hits, ditch the delivery menus and roll up your sleeves-your perfect, garden-fresh pizza masterpiece awaits!