As the holiday season wraps us in its warm, sparkling embrace, there’s one treat that never fails to evoke cozy memories and festive cheer: peppermint bark. But in the bustling world of social media, sharing your culinary creativity requires more then just delicious flavors-it calls for the perfect presentation. Enter the Idea Pin, a vibrant canvas where your peppermint bark can dazzle and inspire holiday lovers everywhere. In this article, we’ll unwrap the secrets to crafting an irresistible peppermint bark Idea Pin that not only captures the essence of the season but also engages and delights your audience with every swipe. Whether you’re a seasoned baker or a creative content creator, get ready to transform your holiday treat into a visual story worth savoring.
Crafting the Perfect Peppermint Bark Idea Pin for Holidays
Crafting the perfect peppermint bark idea pin for holidays is an irresistible way to bring festive cheer into your kitchen and share a classic seasonal treat with loved ones. This timeless confection,renowned for its crisp layers of velvety chocolate and crunchy peppermint,traces its roots back to handcrafted European holiday sweets,evolving into a modern favorite that captivates with every bite. whether you’re a seasoned chocolatier or a joyful novice,mastering this recipe will fill your home with the warmth and whimsy of the season.
Prep and Cook Time
Preparation: 15 minutes
Melting and Setting: 40 minutes
Total Time: 55 minutes
Yield
Approximately 24 festive pieces (serving 8-12)
Difficulty Level
Easy to Medium: Ideal for holiday bakers eager to impress without fuss.
Ingredients
- 8 oz high-quality white chocolate, chopped
- 8 oz premium dark or semi-sweet chocolate, chopped
- 1 tsp peppermint extract
- 1 cup crushed peppermint candy canes or candy pieces
- optional: 2 tbsp finely chopped pistachios or festive sprinkles
- Parchment paper or silicone baking mat
Instructions
- Prepare the work surface: Line a 9×9-inch baking dish or rimmed tray with parchment paper or a silicone mat to ensure easy removal and a smooth finish.
- Melt the dark chocolate: Using a double boiler or microwave in 30-second bursts, gently melt the dark chocolate until smooth. Stir frequently to prevent scorching. Pour evenly into the prepared dish, spreading with an offset spatula to a uniform 1/4-inch layer. Chill in the refrigerator for 10 minutes until set but not fully hardened.
- Melt the white chocolate: Repeat the melting process for the white chocolate, stirring in 1 teaspoon of peppermint extract once melted. Be sure the white chocolate is smooth and lump-free before continuing.
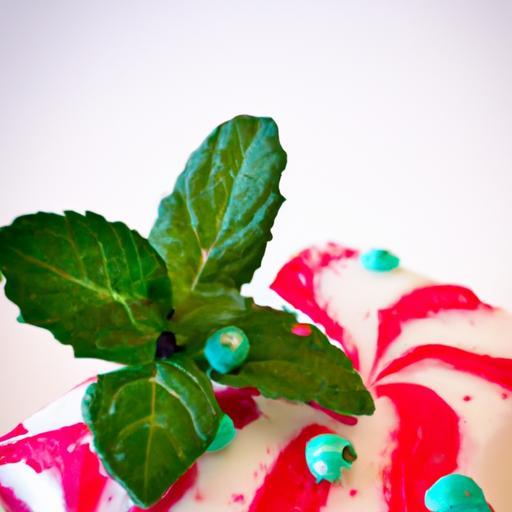
- Layer and add toppings: Pour the warm white chocolate over the chilled dark chocolate layer, spreading evenly but swiftly to avoid blending. Immediately sprinkle the crushed peppermint candy canes across the top, pressing lightly to adhere. add optional pistachios or sprinkles to enhance colour and texture if desired.
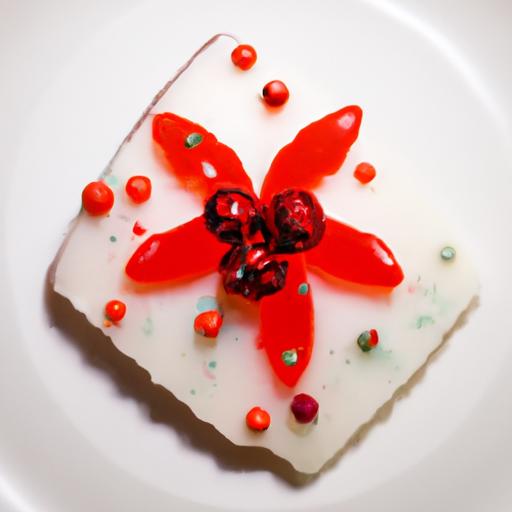
- Set and slice: Refrigerate the layered bark for at least 30 minutes until fully hardened. Carefully lift the bark from the dish using the parchment paper edges and place on a cutting board. Using a sharp knife, cut into irregular or uniform squares for a rustic or polished presentation.
Tips for Success When Crafting the Perfect peppermint Bark Idea Pin for Holidays
- Use high-quality chocolate for a luxuriously smooth texture and balanced flavor.
- when melting chocolate, avoid water contact to prevent seizing.
- adding peppermint extract to the white chocolate enhances flavor without overpowering the bark.
- Work quickly when layering white chocolate and toppings to maintain a crisp, attractive appearance.
- Store bark in an airtight container at room temperature, or in the fridge if your kitchen is warm.
- Consider making the bark a day in advance for flavors to meld beautifully.
Serving Suggestions to Elevate Your Peppermint Bark
present your peppermint bark on a rustic wooden board or lined festive plate surrounded by evergreen sprigs,cinnamon sticks,or miniature ornaments for that extra holiday charm. For gifting, package pieces in clear cellophane bags tied with velvet ribbons, or layer them in decorative tins cushioned with red tissue paper. Serving alongside a steaming cup of spiced hot chocolate or peppermint mocha elevates the experience, inviting guests to savor not just a treat, but a moment of seasonal magic.
| Nutritional Data (per piece) | Calories | Protein | Carbs | Fat |
|---|---|---|---|---|
| Peppermint Bark Piece | 150 | 2g | 18g | 9g |

For more creative chocolate treats, explore our Holiday Chocolate Recipes collection. To deepen your chocolate knowledge and learn the science behind smoothing chocolate perfectly, visit Chocolate science Central.
Q&A
Q&A: Crafting the Perfect Peppermint Bark Idea Pin for the Holidays
Q1: What makes peppermint bark the ultimate holiday treat for an Idea Pin?
A1: Peppermint bark is a visual and flavorful icon of the season-its crisp white chocolate layered with dark chocolate and festive red peppermint bits instantly evokes holiday cheer. Its contrasting colors and textures translate beautifully to a vertical video format, making it perfect for an engaging Idea Pin that captures viewers’ attention and whets their appetite.
Q2: How do I start planning my peppermint bark Idea Pin?
A2: Begin with a festive concept: think cozy,wintry vibes or classic holiday warmth. Sketch out a simple storyboard with key shots-melting chocolate, sprinkling peppermint, cutting the bark into rustic shards. Decide on your color palette and props beforehand (think red, white, green accents) to keep a cohesive look that’s eye-catching and seasonally relevant.
Q3: What filming tips ensure my peppermint bark looks irresistible?
A3: Lighting is your secret ingredient-natural light works wonders to highlight the glossy chocolate and sparkling peppermint. Use close-up shots to capture that satisfying chocolate swirl and texture. Keep your camera steady or employ subtle pans and zooms to build visual interest. Don’t forget to film the satisfying break sound when you snap the bark!
Q4: How can I add creative flair to my Idea Pin without overwhelming the recipe?
A4: Layer speedy process snippets with text overlays featuring fun facts or holiday tips (“Did you know peppermint’s refreshing scent boosts holiday cheer?”). Incorporate playful transitions that mimic sprinkles falling or candy canes swirling. A sprinkle of festive music and some subtle animations-like twinkling lights or snowflakes-can also bring your Idea Pin to life while keeping the focus on the peppermint bark.
Q5: What caption or description will make my peppermint bark Idea Pin truly engaging?
A5: Craft a warm,inviting caption that tells a story or shares a tradition-“From our kitchen to your cozy home,this peppermint bark recipe adds a little magic to every holiday moment.” Include helpful tips for variations or gifting ideas to encourage saves and shares. End with a call-to-action like “Try it today and tag your holiday creations!”
Q6: Any final tips for standing out in the festive Idea Pin crowd?
A6: Authenticity shines-show your personality, whether through quirky behind-the-scenes moments or a secret ingredient twist. Keep the pace lively but not rushed, and don’t forget to optimize your pin with relevant keywords and hashtags like #PeppermintBark, #HolidayTreats, and #DIYDelights to reach fellow holiday enthusiasts. Moast importantly, have fun spreading the sweetness of the season!
The way Forward
As the holiday season wraps us in its joyful embrace, your Peppermint Bark Idea Pin becomes more than just a recipe-it’s a shimmering invitation to share warmth, creativity, and festive cheer. With each swirl of chocolate and sprinkle of peppermint,you’re not only crafting a delicious treat but also a memorable experience that will sparkle across screens and hearts alike. So go ahead, blend those flavors and visuals with holiday magic, and watch your Idea Pin become the sweetest highlight of the season. Happy crafting, and may your peppermint bark inspire holiday smiles everywhere!